The Mergenthaler Linotype Company (and also the Intertype Corporation, for its machines) assembled each machine at the factory and then stripped it to one level or another. This created more manageable assemblies, but let them retain many factory-set adjustments within these assemblies. The assemblies were crated and shipped, and the machines were then reassembled on-site. This method assumes, of course, the existence of someone capable of reassembling a Linotype from component assemblies.
The documents collected here are the factory instructions for reassembling various model Linotypes from the base up, given the parts and assemblies as shipped in multiple boxes from the factory (that is, from the "stripped to base" state). Note also that Chapter 31 of Linotype Machine Principles discusses the opposite task: how to "take down" (disassemble) a Linotype (a Model 8 in that case).

Weights for Export and Stripping a Model 31
Weights and Measurements for Linotype Machines for Export [with appendices on stripping procedures for the Model 31]. (Brooklyn, NY: Mergenthaler Linotype Company, n.d.) Thanks are due to Dave Seat of Hot Metal Services for preserving this literature and making it available.
Here is a local copy of the PDF: linotype-weights-and-measurements-for-export-and-stripping-procedures-0600dpijpg.pdf
Erection and Inspection Report
"Erection and Inspection Report." (Brooklyn, NY: Mergenthaler Linotype Company, 1958). A two page checklist for final erection and/or inspection on-site of a Linotype. Document ID: 28-7352 10-58-5M
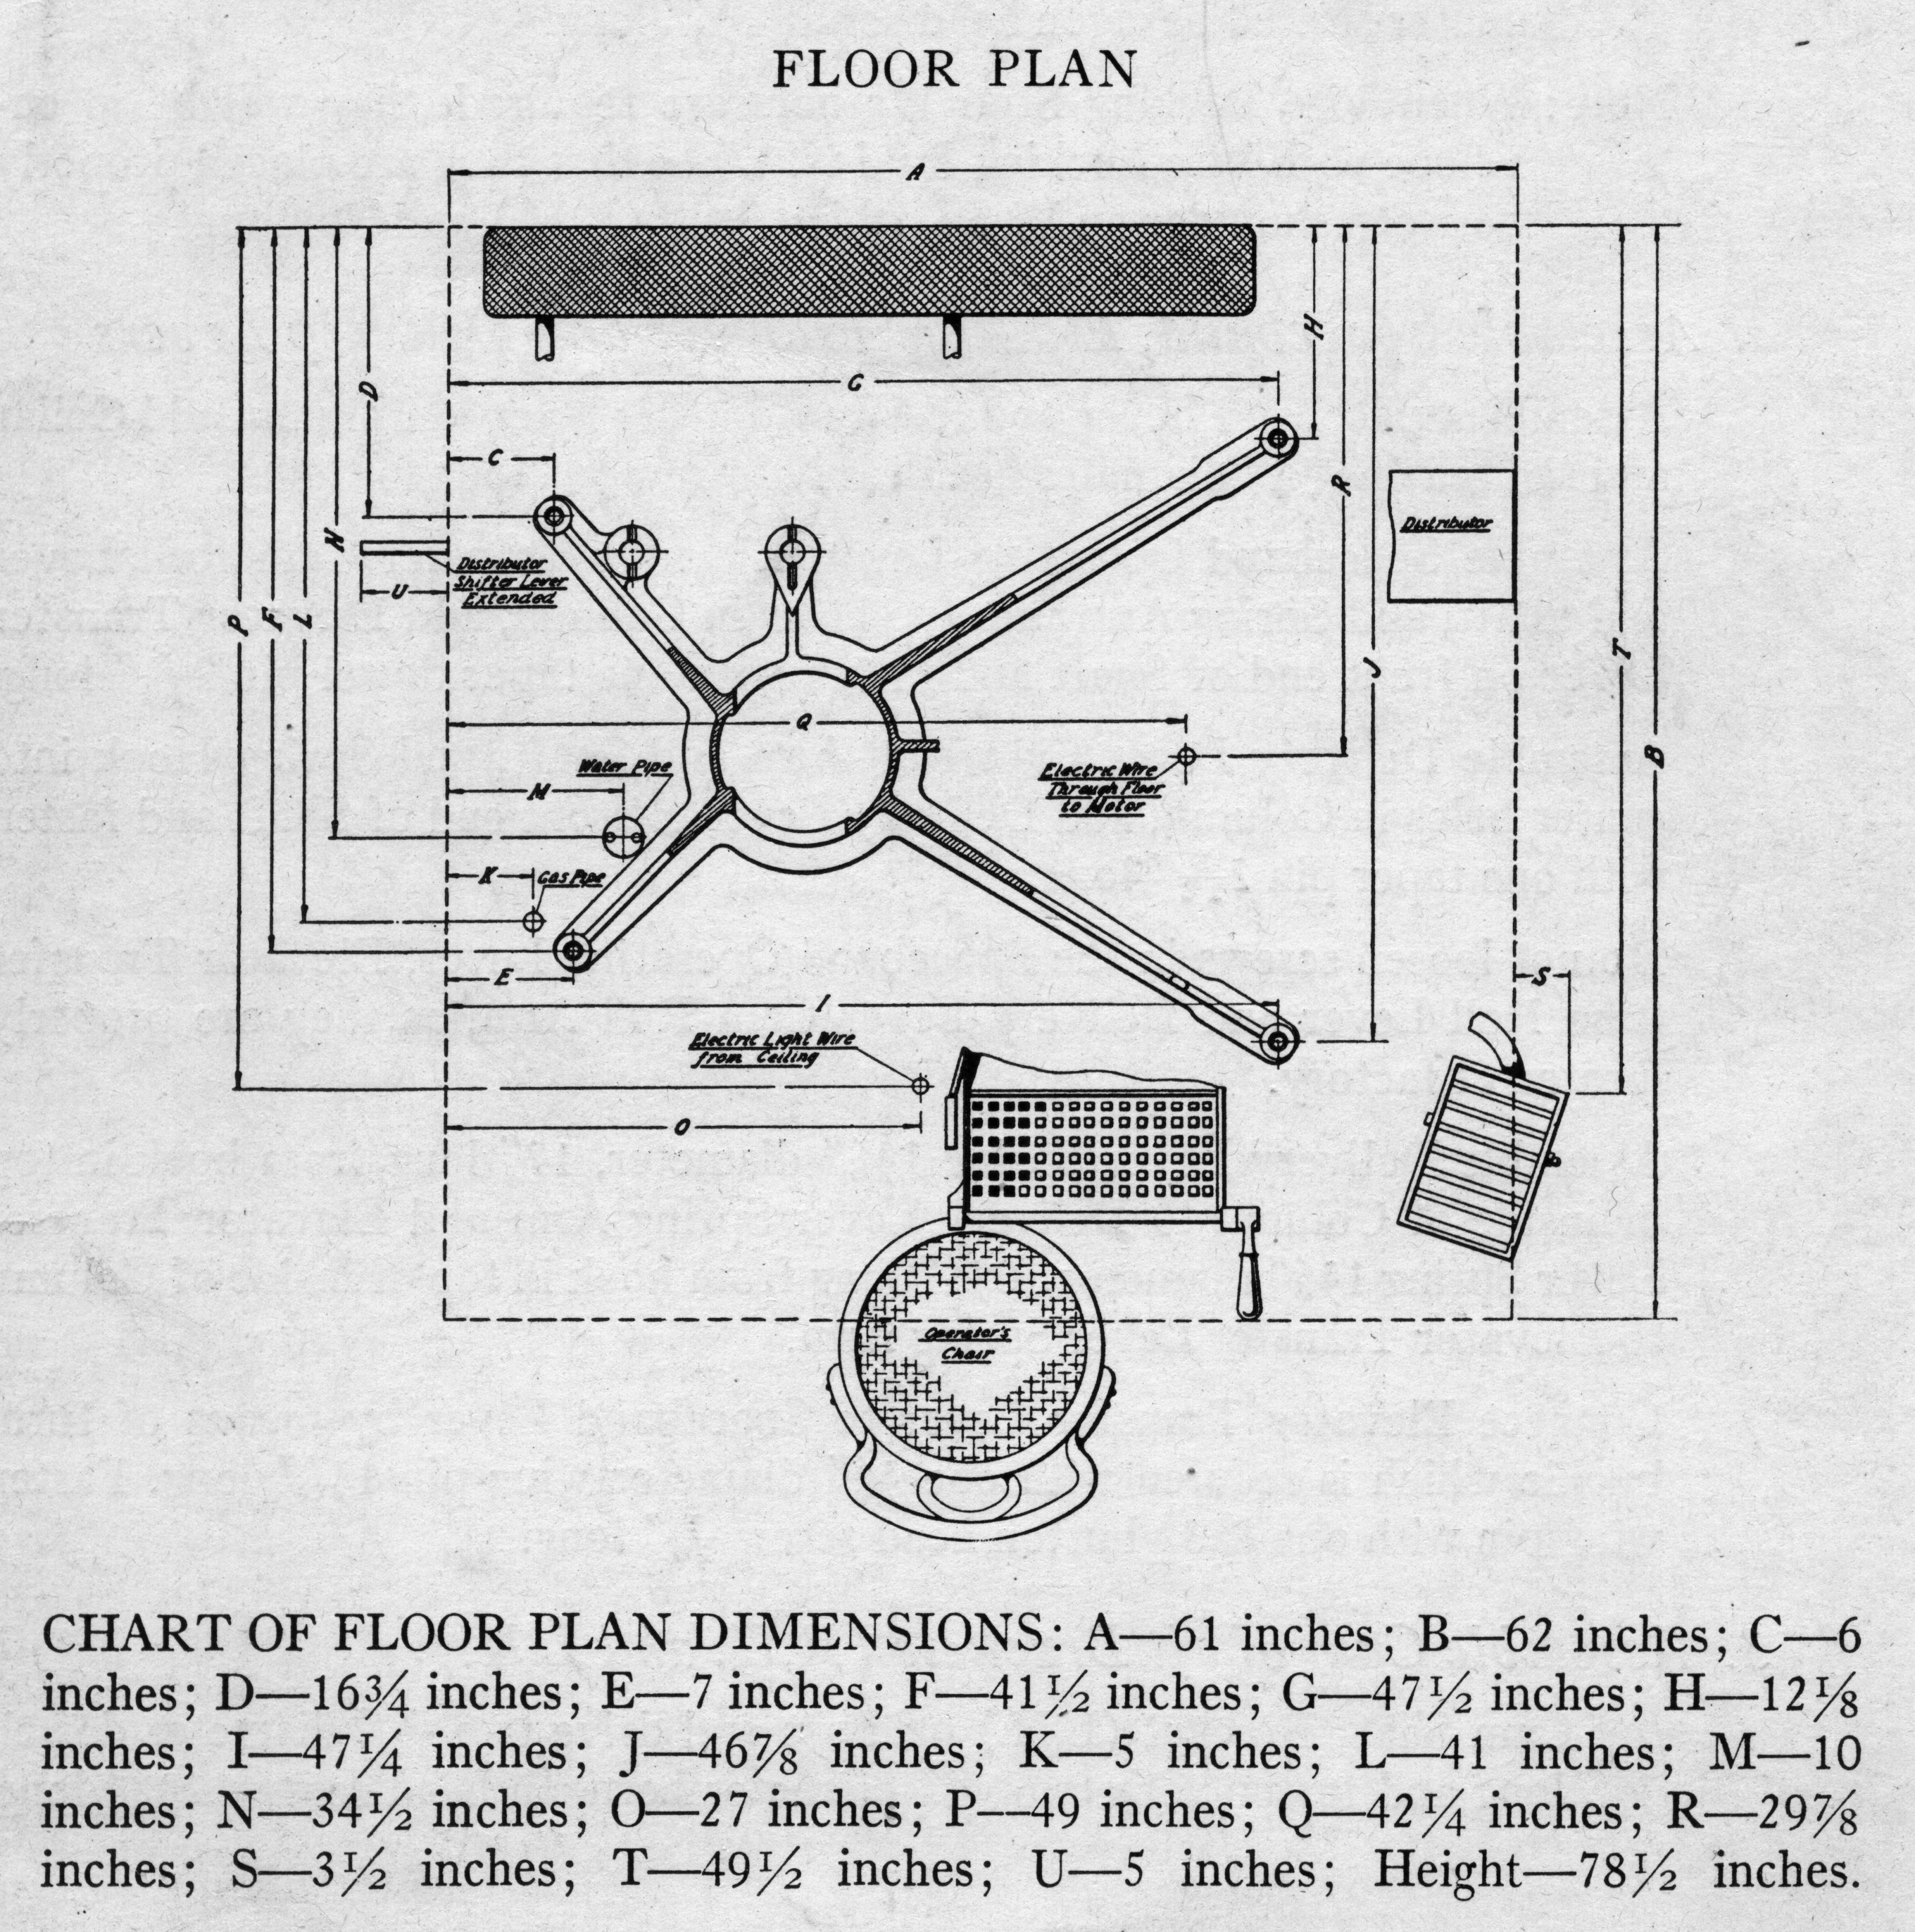
Erecting the Blue Streak Model 5 Linotype
This is a technical book which describes the procedure for erecting a Model 5 Linotype from the "stripped to base" state that it would have been in as shipped from the factory to a US destination. Note that this is for a "Blue Streak" vintage machine. The Model 5 was made from 1906 through the end of production, however, and many changes were made during that period, so the information in this booklet may or may not apply to other versions (a "Blue Streak" era Model 5 is substantially heavier than an early Model 5). It includes a dimensioned floor plan. 621.05.1-K-Z-15Z.
The icon here links to a presentation of this document at The Internet Archive. Here is a local copy of the PDF (200 Megabytes): instructions-for-erecting-blue-streak-model-5-linotype.pdf
Erecting the Blue Streak Model 8 Linotype
Instructions for Erecting BLUE STREAK Model 8 Linotype. (Brooklyn, NY: Mergenthaler Linotype Company, 1936). Printing code: 621.08-K-O-15Z.
Thanks are due to Dave and Beth Seat of Hot Metal Services for preserving this book and making it available.
The icon here links to a presentation of this document at The Internet Archive. Here is a local copy of the PDF (146 Megabytes): mlc-instructions-for-erecting-blue-streak-model-8-linotype-621-05-K-O-15Z-1936-hms-0600rgbjpg.pdf
Erecting the Blue Streak Model 31 Linotype
This is a technical book which describes the procedure for erecting a Model 31 Linotype from the "stripped to base" state that it would have been in as shipped from the factory to a US destination. It includes a dimensioned floor plan. From its introduction in the 1930s through the end of Linotype production, the Model 31 was the basic multiple-magazine nonmixer machine (using standard magazines). 621.31.1-I-PP-10M.
The icon here links to a presentation of this document at The Internet Archive. Here is a local copy of the PDF (584 Megabytes): erection-procedure-for-the-model-31-blue-streak-linotype.pdf
Erecting the Blue Streak Model 32 Linotype
This is a technical book which describes the procedure for erecting a Model 32 Linotype from the "stripped to base" state that it would have been in as shipped from the factory to a US destination. It includes a dimensioned floor plan. A Model 32 is effectively a Model 31 plus auxiliary (side) magazines. 621.32.1-B-PP-5X.
The icon here links to a presentation of this document at The Internet Archive. Here is a local copy of the PDF (856 Megabyptes): erection-procedure-for-the-model-32-blue-streak-linotype.pdf
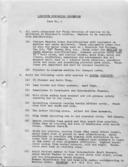
Linotype Finishing Procedure
How to do the final assembly and adjustment of a mostly-assembled Linotype.
As reprinted, this document also includes a copy of the Mergenthaler Erection and Inspection Report (reprinted separately above) . While the "Finishing Procedure" describes procedures employed at the factory and the "Erection and Inspection Report" defines things to check at the customer site, both were given to the customer (in this case the Manitowoc, Wisconsin Herald Times) and kept as a single document. It also includes a sheet of drawings of gauges for use in erecting the machine, as supplied to the customer. Note that it contains two pages numbered "32" and two pages numbered "42"; this suggests that it might in fact be composed of parts of two different edition. Even if you're not finishing a Linotype, the information on pp. 44-45 giving Mergenthaler's acceptable tolerances for slug dimensions is useful to any operator-machinist.
Thanks are due to Dave Seat of Hot Metal Services for preserving these documents and making them available for digitization. Dave does know how to assemble a Linotype from component pieces into an operational machine, and has done so on several occasions.
The icon here links to a presentation of these documents at The Internet Archive. Here is a local copy of the PDF (it is quite large, 752 Megabytes): linotype-finishing-procedure-manitowoc-herald-times-hms-0600dpijpg.pdf
The Mergenthaler Weights and Measurements for Linotype Machines for Export was published in the US without copyright notice at a time when such notice was required to secure copyright. It therefore passed into the public domain upon initial publication. The digital reprint here remains in the public domain.
All portions of this document not noted otherwise are Copyright © 2011 by David M. MacMillan and Rollande Krandall.
Circuitous Root is a Registered Trademark of David M. MacMillan and Rollande Krandall.
This work is licensed under the Creative Commons "Attribution - ShareAlike" license. See http://creativecommons.org/licenses/by-sa/3.0/ for its terms.
Presented originally by Circuitous Root®
Select Resolution: 0 [other resolutions temporarily disabled due to lack of disk space]